This is the third in a trilogy of posts about animation basics by Rex Smeal, animator, and friend to cephalopod and amphibia alike.
Welcome back! If you haven’t read the first and second parts of our animation basics trilogy, you should check it out! This third article is about Spatial Distortion!
Spatial Distortion
Distorting objects to accentuate their motion is something that animators have been playing around with since before they were animators – painters, comicbook artists, even sculptors to a lesser degree have all distorted reality to give a greater impression of motion. Speedlines, blurs, extreme perspective, stretching, various repeating-image techniques. Some of these transfer well to animation, others tend to get in the way.
Blurring
Blurring occurs in the “real world” when something is moving fast through a photograph exposure (or frame of film) and light reflects off of it into the camera through a range of motion, rather than creating a single image. Remember those oldschool cameras where people were asked to sit still for a minute? That was to avoid blurring across a much longer exposure.
Of course, in animation we don’t have to worry so much about this happening by accident, but it can be a useful technique for avoiding obvious afterimages (see Part 1: Spacing) and creating a greater sense of speed. Blurring can be slight, or the entire object can vanish into a dramatic blur until it slows down! The important thing to remember is that blurs will make everything smudgy if used too often, over too great an area, or on objects moving too slowly, and will not blend well with certain graphic styles. They can also be processor expensive if generated procedurally.
Smearing
Smearing is a kind of deliberately symbolised blur, and in many cases looks much cleaner where a blur would be out of place. For example, if there are a lot of high-contrast areas, as in a kid’s cartoon, or on simple interfaces, a blur will be a strange smudge in a world of hard lines and contrasting colours. So the various techniques of smearing help maintain visual style while performing much the same function as a blur would otherwise.
Smearing has become a bit of an art form in itself, decades of economising children’s animation led to all sorts of interesting methods for cheap motion that didn’t require many complex drawings.
Squash/Stretch
This is perhaps the most well-known animation technique, Squash and Stretch, put simply, is the distortion of an object to reflect forces being applied to it (which would normally be invisible/too fast to see). If you imagine a bouncing rubber ball’s motion broken down:
- Moving quickly through the air, it’s sides taper against air resistance.
- As it hits the floor, all the parts of the ball want to keep moving forward so the sides of the ball distort flat to push themselves up against the surface – this is obviously dependant on the angle of impact.
- The elasticity of the ball cause it to snap back into shape as Newton’s third law forces the ball from the floor at near-equal speed to it’s arrival, which means we almost immediately regain the elongated look, though now rising instead of falling.
- As the ball rises, gravity reduces its velocity, and the air resistance against it decreases; so the ball returns to it’s natural shape, only to repeat the process as passes the bounce’s apex and falls anew.
Without a slight squash/stretch effect during fast motion, your objects will appear rigid and lifeless (sometimes a desirable effect), but too much squash/stretch and they’ll appear cartoony or overly bouncy. Getting the perfect level of distortion actually makes objects appear to move more realistically!
General Advice
The techniques outlined in our Animation Basics trilogy are really just the very top layer of what is possible when you’re creating motion, particularly in the digital realm. They provide a starting point for many basic effects, but they can and should be combined, modified, used across three dimensions rather than two, even actively ignored or opposed. So long as you’re thinking about what you’re doing, about physics in the real world as they apply to gravity and momentum, and learning from failed experiments, there’s no end to the complexity of motion you can explore.
Finally, I’ll leave you with an old rule amongst artists (and animators in particular) that goes something like:
“If it looks right, it is right, even if it’s wrong.”
And the inverse of that might be:
“If it looks wrong, make it look right, even if you have to break the rules to do it.”
So the trick is not to look for hard and fast rules in animation, instead look at your result, and make judgements on your next step to take based on how it feels to you- because that’s how it’ll feel to your viewers/users.
Miscellaneous
“What framespeed should I use?”
It depends. There are a lot of factors to consider. 24fps is traditional disney animation speed- but that’s for animating complex figures, and is usually performed by teams of full-time animators. With the invention of procedural animation techniques like tweening, you should be able to apply most of these techniques smoothly to even something crazy like 200fps very easily. As a general rule, anything around 30fps will be much smoother and less likely to leave afterimages, but depending on how you’re making your animation, and what sort of device you’re displaying it on, it may not be economical or practical to work at this speed!
“I’m a developer making interfaces, do i really need to take these techniques into account? Will people even notice them?”
People will notice if they’re missing. Two apps on the subject of pizza restaurants perform the same task with similar graphics, but one moves through it’s frames with the squashing and stretching motion of strands of mozzarella cheese? It’s a distinct advantage.
“I’m a developer, and this was interesting, but I don’t think Disney will be hiring me just yet. What can I do myself/in-house, and what should I hire a dedicated animator for?”
Assuming the programming knowhow is present, with a little practice and experimentation (literally an hour or two of messing around), the techniques in this blog can be effectively applied to simple interface components and very simple objects like falling rocks or bouncing balls at a passable level by anyone. But for characters, handdrawn animation, complex elements like flags, water and fire, explosions, lightning, complex composite objects, depicting weight, emotions, reactions, and for making unique interfaces that move with real flair- and animating all of these well: requires a kind of mental library of natural motion, as well as an experienced animator’s eye for mistakes and improvements. Someone without a few years on the clock won’t be able to make complex animation move well.
“Okay, so I need an animator. What should I look for in my new hire?”
Ideally, as usual for any position, you want to see referrals from previous clients and examples of relevant work, but if you want something weird, that might not always be possible. Most animation students are more interested in character animation than interfaces or other “inanimate” elements- and particularly in terms of developing software, often you may be better off seeking out a graphic designer who dabbles in animation than a “traditional animation” school-trained Animator.
“I’ve decided that I want to be an expert animator, but I’ve no idea where to start. What’s next for me?”
If you’re lucky enough to live near a good animation school (the quality of which you will learn by contacting previous students about the courses there, and remember to ask to see examples of their work)- that’s your next port of call. If not, you’ll be joining me in a never-ending self-taught quest to study and replicate the natural motion of the world. Animators love dissecting each other’s work, and there’s no shortage of amateur critical analysis communities online. If all else fails, let Richard William’s ‘Animator’s Survival Kit’ be your guiding star!
Jargon
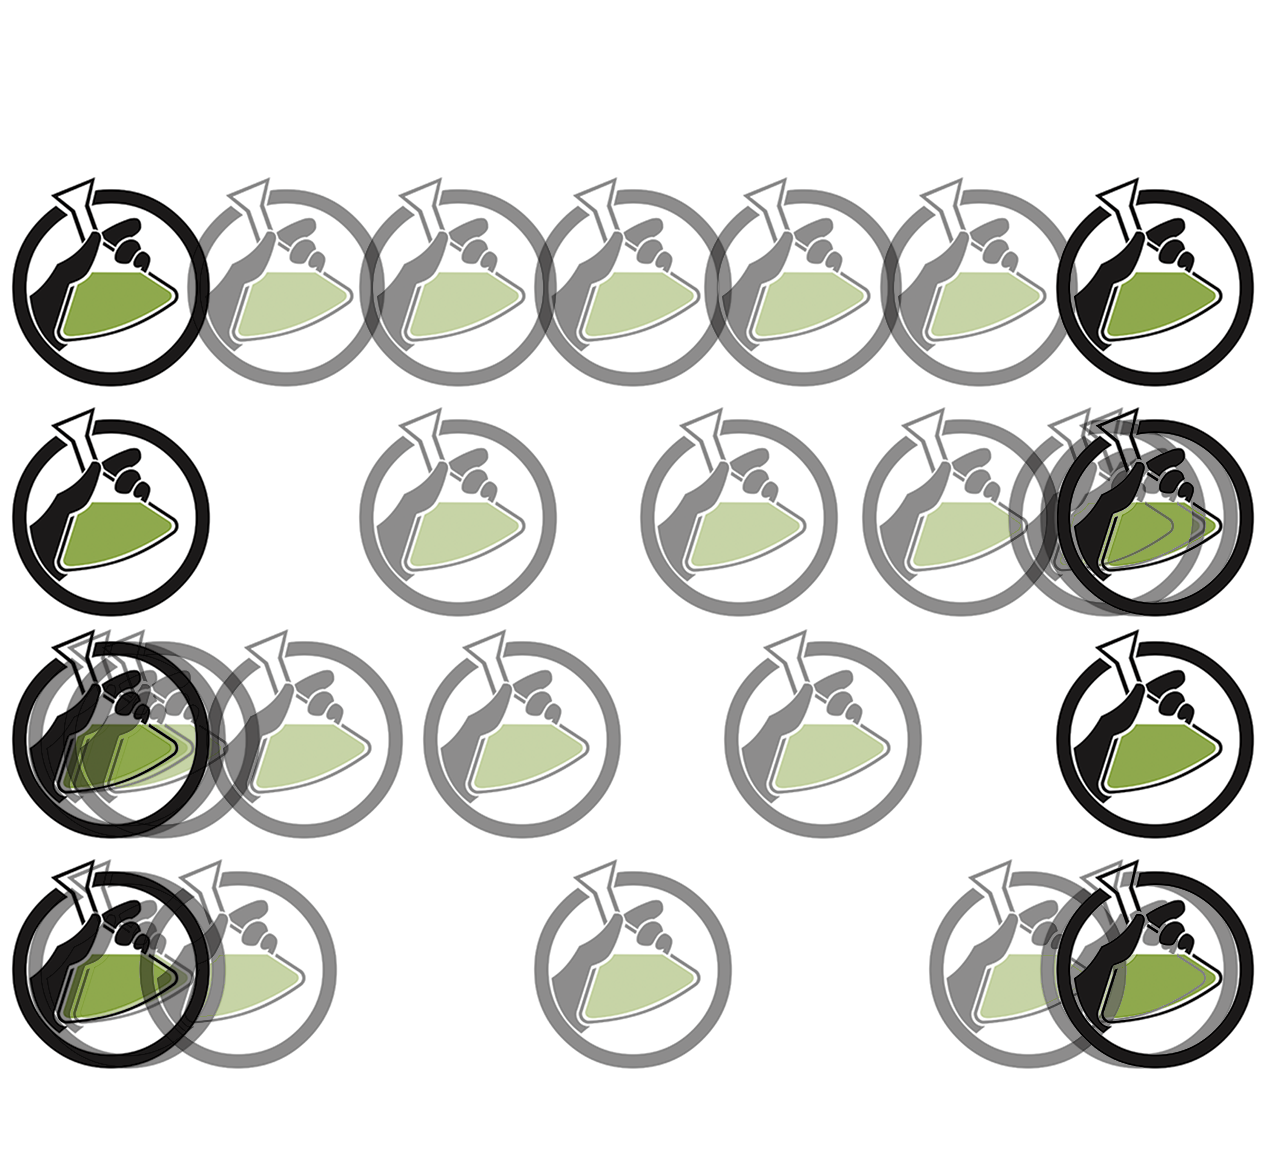
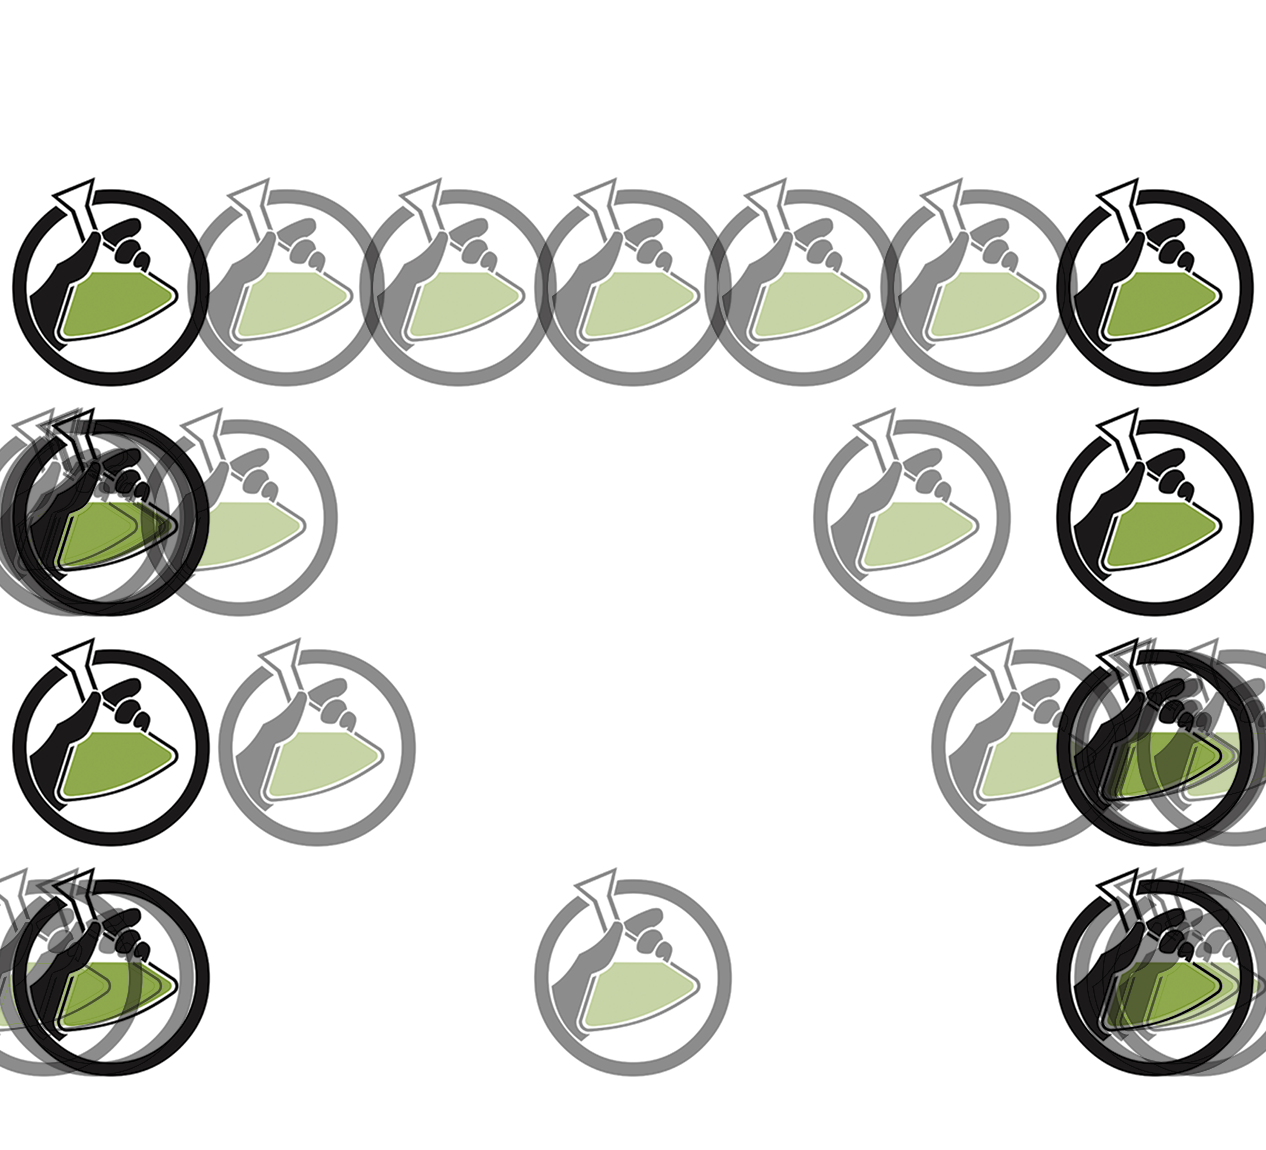
Spacing: The placement of frames throughout a set (or open) timeframe, usually between defined keyframes. This can be thought of as animation at the micro level.
Timing: Choosing timeframes for objects, particularly choices in terms of different objects interacting throughout time. This can be thought of as animation planning, defining constraints for spacing.
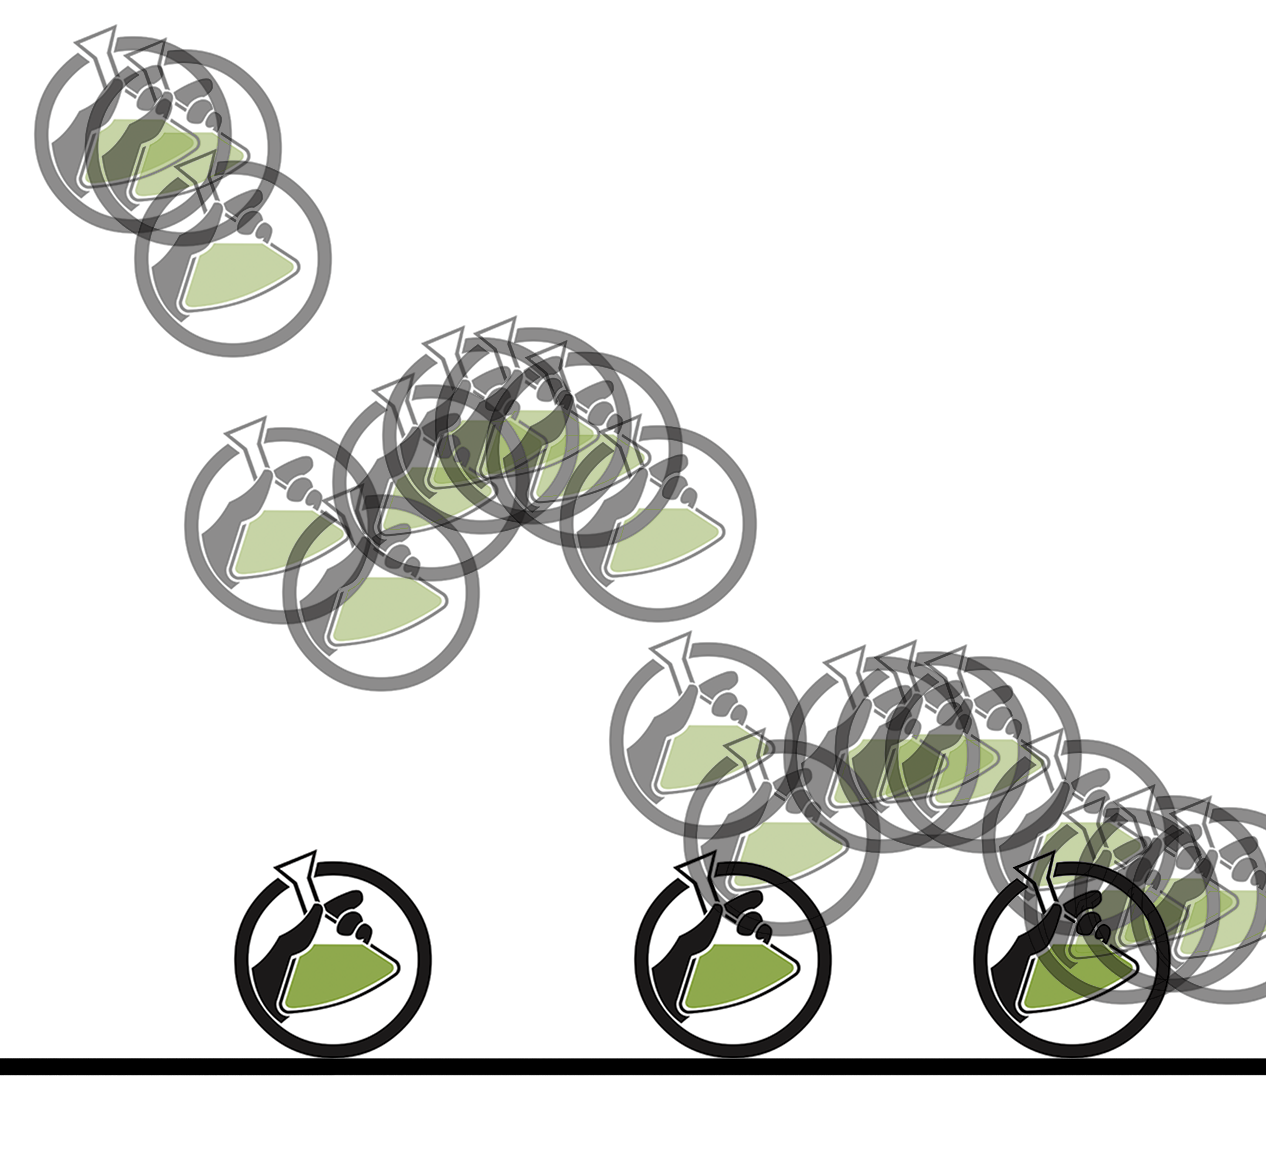
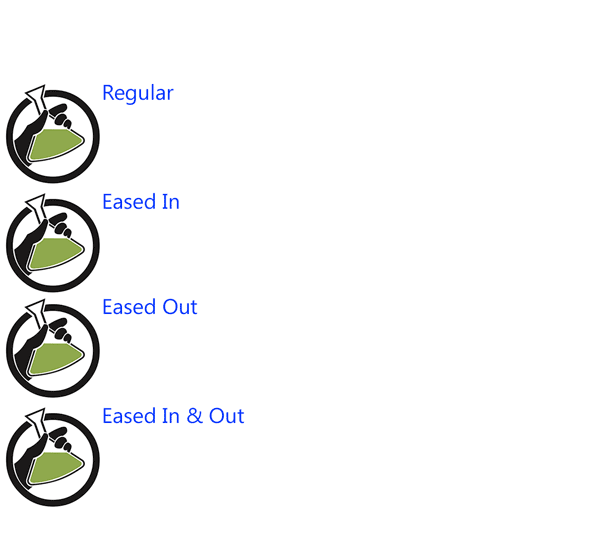
Easing: Spacing that favours smooth transitions from a keyframe- Usually expressed as slowing into a key, or slowing out of a key.
Frame: A single image or exposure- will be displayed for a predetermined time based on framespeed, which is expressed in the number of frames per second (fps).
Keyframe: An “important” frame usually with a specified time- The start and end positions of an object’s animation might be considered keyframes. Additionally, if an object must move from A to C through B- there might be keyframes at A, B and C, with inbetweens (see below) between them. Defining keyframes first as a Timing element can simplify the inbetweening process.
Inbetween: The frames that sit between keyframes- their placement is known as “Spacing”.
Tweening/A Tween: A software assisted technique for placing inbetweens- will often allow for automation of some basic spacing techniques such as easing in or out.
Cycle: A sequence of animation that repeats the motion of an object seamlessly.
Loop: A sequence of animation that repeats.