Posts tagged foss
How Night in the Woods Uses Yarn Spinner

We recently announced that we're building Night in the Woods for mobile! We're super excited about this, so we thought that we'd share a bunch of technical behind-the-scenes stuff on our blog over the coming weeks and months. This is the first of those posts! 

Yarn Spinner is the dialogue engine that we wrote, and was used in Night in the Woods. It’s open source, freely available, and we think it’s pretty powerful.

One of the reasons why we think Yarn Spinner is powerful is that it’s designed to focus on as little as possible. There’s literally only three things that Yarn Spinner can do with your game: it can send lines of dialogue, ask for a selection among a group of options, and send a command for your game to interpret.

The idea behind this is that your game can add what it needs to on top, rather than being forced to fit inside the ideas that we had when we first wrote the system. There are several excellent dialogue systems that are designed to be very good at operating within the structure of a role-playing game, or a choose-your-own-adventure system (Twine is a great example of this last one), but for Yarn Spinner, we wanted the system to be more generalised, and able to be applied to a wide variety of games systems.

The consequence of doing that, however, is that a game needs to do more work to add the features that it needs. While we built Yarn Spinner with NITW in mind, there are several features that are quite specific to the game. 

In this post, we’ll highlight some of the cooler things that Alec Holowka, the lead developer of Night in the Woods, built on top of the Yarn Spinner system to support its needs.

Example Dialog

Here’s an example of the kind of dialogue that exists in Night in the Woods. Here’s Mae and Gregg, planning on going to Donut Wolf:

Gregg: They got pancakes now! :)
<<close>>
//angus walks across the screen and off the left//
<<walk Angus AngusOffLeft>>
<<wait 3>>
Angus: fine.
<<lookUp Mae>>
<<lookUp Gregg>>
Gregg: \o/ D:
Gregg: RIDE THE CHARIOT!
<<dilate Mae .85 .5>>
Mae: TO DONUT HELL!!! \o/
<<runNextLinesTogether 2>>
Mae: {width=8}[shake=.05]AWOOOOOOOOOOOOOOOOO!![/shake]
Gregg: {width=8}[shake=.05]AWOOOOOOOOOOOOOOOOO!![/shake]

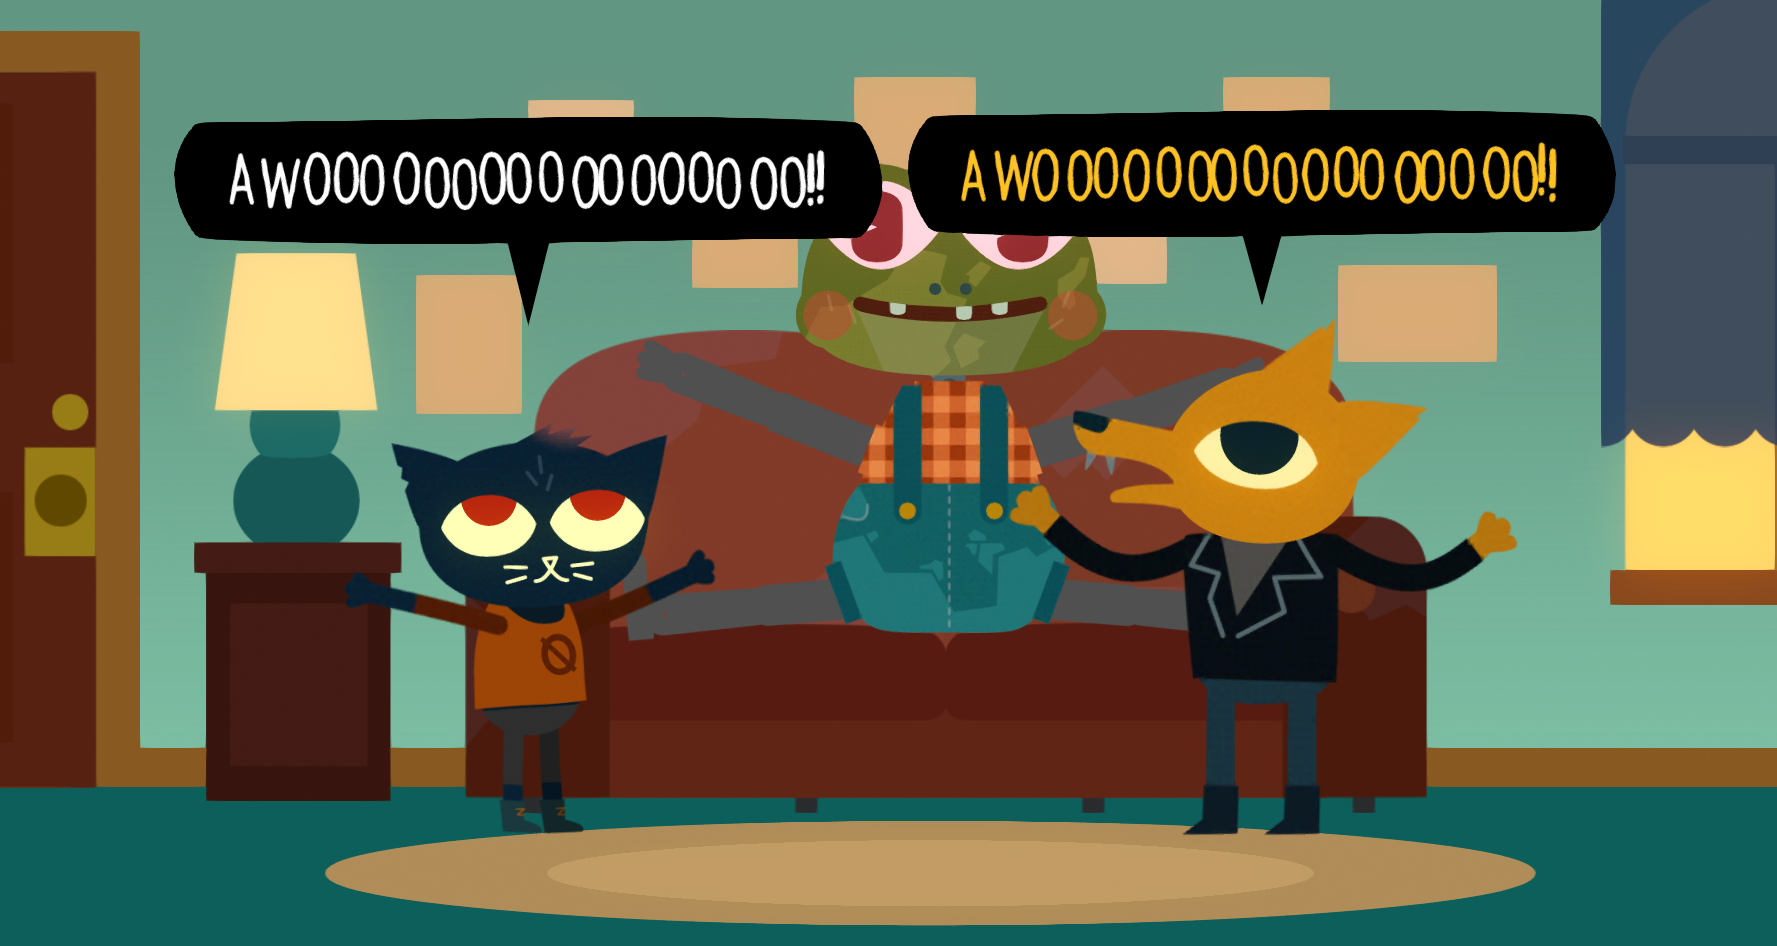
This dialogue is part of the raw source code of Night in the Woods. When the scene loads, the dialogue attached to the characters is parsed; first, it’s parsed into a data structure called a parse tree, which is then converted into a simple binary representation. This process is quite similar to how other code gets compiled into a binary that can be run on a machine.

At the end of this process, the resulting bytecode for the above dialogue snippet is this:

Node GreggFQ4Intro:
     0   L0:
             RunLine         GreggFQ4Intro-0           
             RunCommand      close                           
             RunCommand      walk Angus AngusOffLeft                      
             RunCommand      wait 3                          
     5       RunLine         GreggFQ4Intro-1          
             RunCommand      lookUp Mae                      
             RunCommand      lookUp Gregg                      
             RunLine         GreggFQ4Intro-2         
             RunLine         GreggFQ4Intro-3        
    10       RunCommand      dilate Mae .85 .5                      
             RunLine         GreggFQ4Intro-4       
             RunCommand      runNextLinesTogether 2                      
             RunLine         GreggFQ4Intro-5      
             RunLine         GreggFQ4Intro-6     
    15       RunCommand      close                           
             RunCommand      irisOut 1 wait                      
             RunCommand      sectionTitle GreggFQ4Intro BeaCar                      
    18       Stop                                            

String table:
GreggFQ4Intro-0: 
    Gregg: They got pancakes now! :) (GreggFQ4Intro:1)
GreggFQ4Intro-1: 
    Angus: fine. (GreggFQ4Intro:6)
GreggFQ4Intro-2: 
    Gregg: \o/ D: (GreggFQ4Intro:9)
GreggFQ4Intro-3: 
    Gregg: RIDE THE CHARIOT! (GreggFQ4Intro:10)
GreggFQ4Intro-4: 
    Mae: TO DONUT HELL!!! \o/ (GreggFQ4Intro:12)
GreggFQ4Intro-5: 
    Mae: {width=8}[shake=.05]AWOOOOOOOOOOOOOOOOOOOOOO!![/shake] (GreggFQ4Intro:14)
GreggFQ4Intro-6: 
    Gregg: {width=8}[shake=.05]AWOOOOOOOOOOOOOOOOOOOOOO!![/shake] (GreggFQ4Intro:15)

Each line of this bytecode is then executed, one after another, by Yarn Spinner, which sends along the lines, options and commands that it encounters. This is part of the standard behaviour of how Yarn Spinner works in any game; where Night in the Woods differs is what it does with its lines.

Character Names

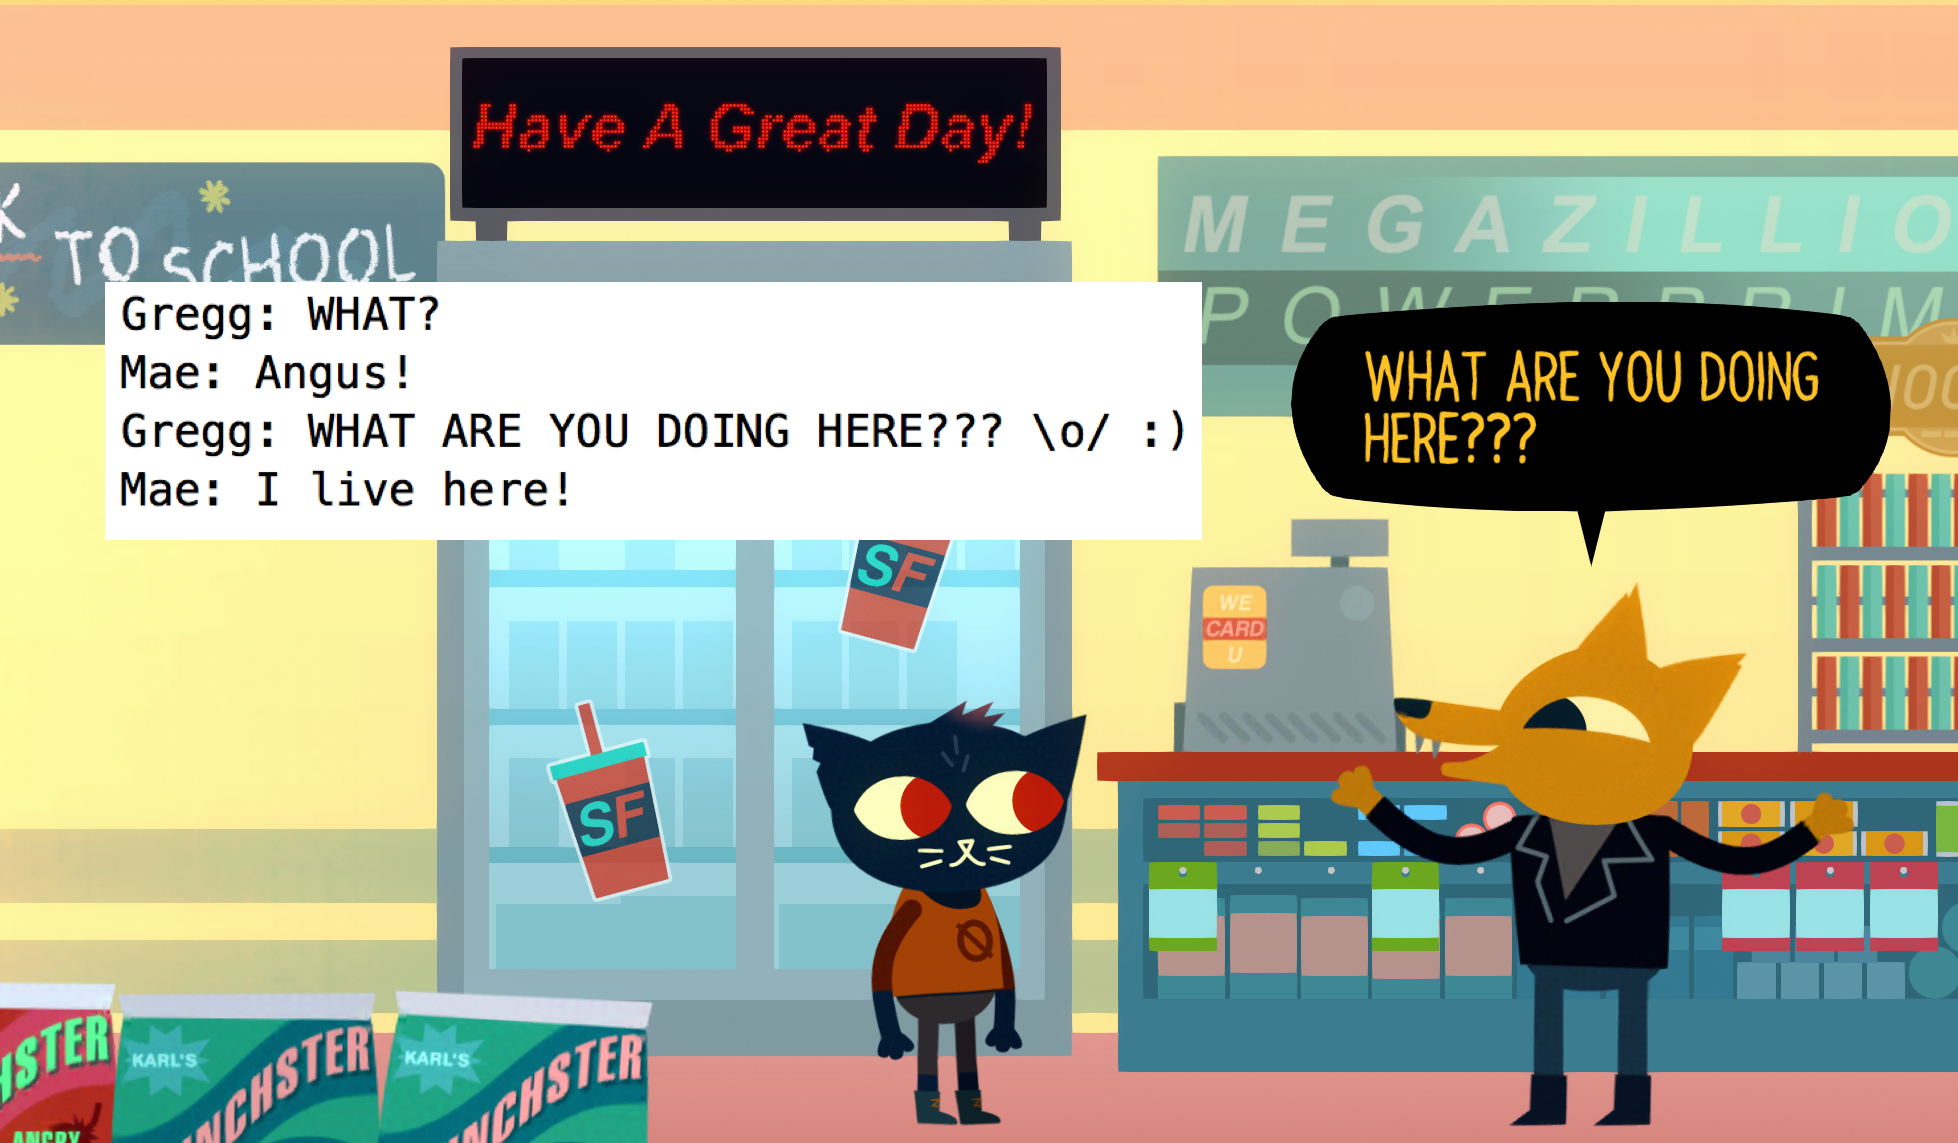
Night in the Woods shows its dialogue in speech balloons that are attached to the characters. In order to correctly position them, NITW needs to know which character a line should be shown attached to; to figure that out, NITW looks at the start of each line, and figures out if it begins with a name followed by a colon.

Screenshot2.png

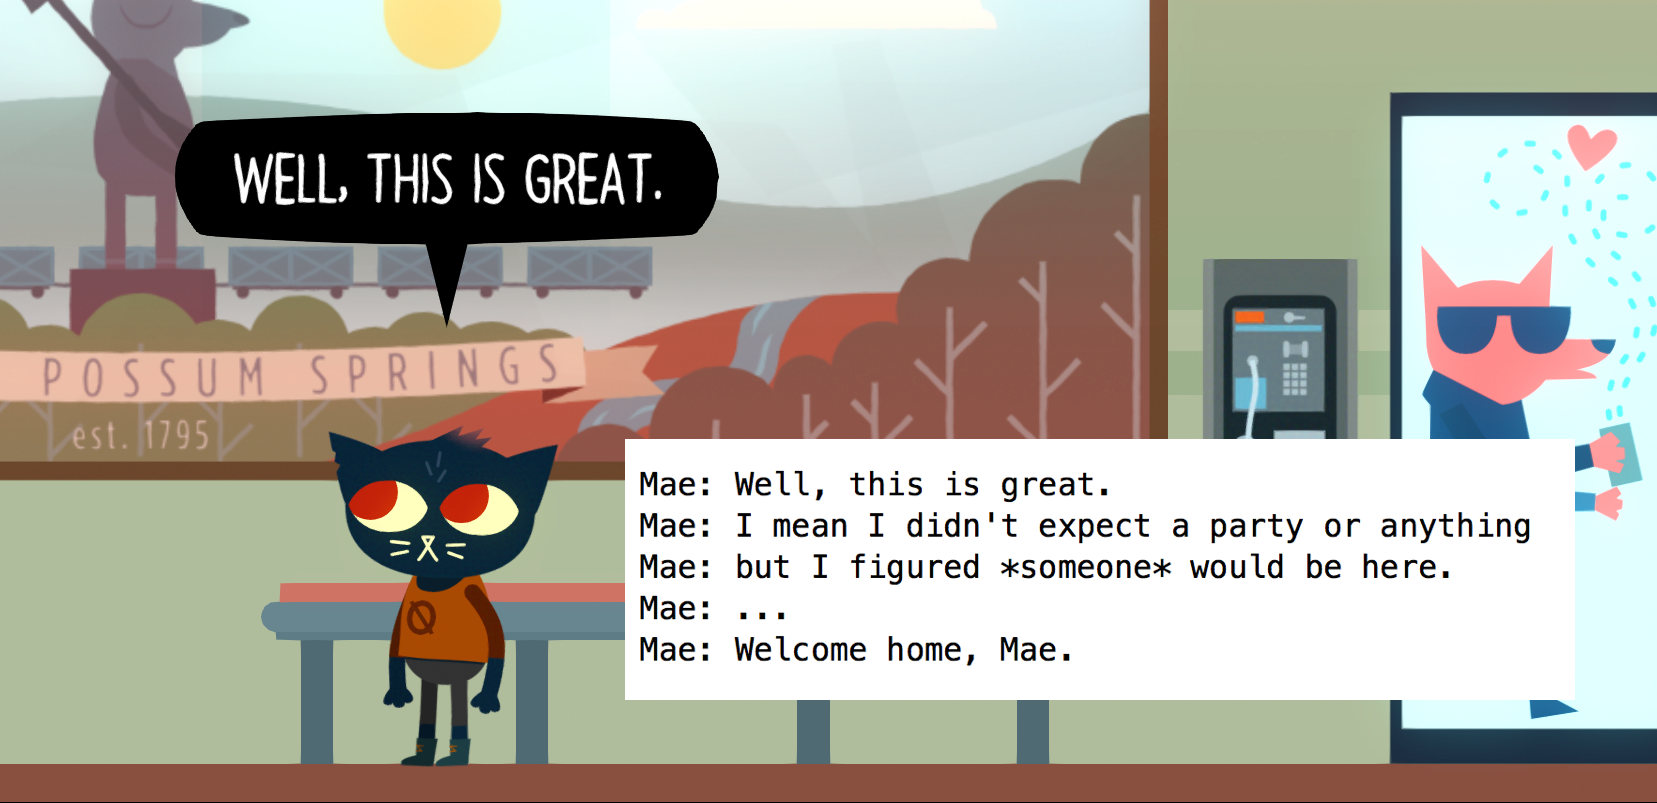
If it does, then the game checks to see if that character is in the scene; if they are, the speech balloon for the line is attached to that character.

Emoticons

Emoticons, or “what we used to use before emoji were a thing”, are those little faces that are composed out of plain text - stuff like :) and :(. Night in the Woods uses these to control player expressions, by looking for any emoticons that it recognises. When it encounters one, it triggers a corresponding animation action, such as animating from the neutral expression to a smile.

Screenshot3.png

There are several different kinds of emoticons. In addition to the smileys that control facial expressions, the game also includes several gestures as well; for example, whenever Mae puts her hands on her hips, it’s because the line included the emoticon “<o>”; when she throws her hands up into the air, it’s triggered by “\o/“.

This is true for other characters as well. When Gregg starts flailing his arms after Mae meets him in the Snack Falcon at the start of the game, it’s the result of using the emoticon sequence “:) \o/“

Screenshot4.png

Markup

Night in the Woods responds to custom syntax within lines that let a writer mark up the dialog for visual effects. For example, when a character needs to shout, the line contains markup like this: 

Mae: {width=8}[shake=.05]AWOOOOOOOOOOOOOOOOO!![/shake]

This causes the specific range of letters to be delivered in a shaky style. The markup also supports effects like character size, color, and balloon position, as well as fun effects like making a line of text wave.

Screenshot5.gif

Commands

Finally, Night in the Woods makes extensive use of commands. In Yarn Spinner, if you wrap some text in <<angle brackets>>, it won’t be sent to the game like a line of dialogue. Instead, it’s delivered as a command; the intent is that the game will manually parse its contents, and perform some action in the game.

Every time you see a character do anything besides talk, it’s the result of an action. There are a huge number of possible commands in the game; on top of the usually expected actions like sit, stand, walk, and jump, commands can also be used to control where and how a character is looking, the dilation of their eyes, and whether they’re visible or not. This last command is extremely important, since it’s used to control whether a character is present in a scene on a given day.

What’s interesting about NITW is that just about all of the gameplay logic is driven through Yarn Spinner. The language wasn’t designed to be a general game logic control system but it turns out it’s pretty good at this. That’s cool.

Taking it further

Several of these are very specific to NITW and its systems, while others are things that could probably apply to most games. As we continue to work on Yarn Spinner, we’re looking forward to making the project the best dialogue system it can be. For more information on Yarn Spinner, visit the project’s page on GitHub at https://github.com/thesecretlab/YarnSpinner.

If you're interested in more information on how we made Night in the Woods better with our open source software, check out Jon's talk from GDC 2017 on YouTube

Follow us on Twitter for more news and updates: @thesecretlab


Captain: Add Hooks to Your Code
captain-hook-halloween-costume

So, here’s another something that we’ve been working on.

Captain is a lightweight library that lets you add hooks to your code, using JavaScript. We designed it for two reasons:

  • If you’ve got a bunch of objects, each needing a small amount of custom objects, creating a subclass for each variation is cumbersome, and devising a sophisticated data-driven architecture is often overkill and sometimes impossible for your use case.
  • Extremely rapid iteration, skipping the compile/install phase, is awesome.

Many of the games we make involve a lot of special-cased behaviour. Like all halfway decent developers, we try to minimise this, but sometimes you really just need a sprite that walks two feet left, three right, and does a twirl, and there’s nothing else in the game that you can generalise into a nice, reusable system.

We’ve already found some great results in allowing field-testers and non-programmers to make modifications to iOS applications by exposing certain resources to iTunes File Sharing. For example, if you’re writing an app that has a lot of sound effects, it makes your sound designer’s life a heck of a lot easier if they can open up iTunes and drop in a replacement sound file, and see how it sounds in your app without having to get another build.

What we ended up doing was using JavaScriptCore, which is the built-in JavaScript runtime on iOS, to create a very loose binding to Objective-C, and then allow Objective-C objects to delegate parts of their behaviour out to JavaScript.

Captain isn’t a scripting bridge. This means that it’s a slightly different thing to libraries like the excellent jscocoa. Most scripting bridges allow you to write entire apps in other languages, which is super cool. However, we really like Objective-C, and find that using the native language for the iOS platform is the best way to approach most things.

Captain, therefore, lets you expose very specific parts of your application’s behaviour to scripts, effectively creating a domain-specific language for your app. Plus, it’s all designed to be super lightweight.

An important note: Apple’s rules say your app isn’t allowed to get scripts from the outside world and run them. This means that you can’t use Captain to build a plugin architecture for your app, but you can use it during development to make your edit-build-compile cycles faster and more flexible.

How to use it

The most basic use case for Captain is when you want to run a JavaScript function, and get back whatever the function returned.

When you work with Captain, you first create a JSContext object, which serves as the execution environment for all of your scripts. You can create as many contexts as you like, but each one is kept separate from each other, and variables won’t be shared between them.

Creating a JSContext looks like this:

Once a context has been set up, you can give it JavaScript code to execute. You do this using the evaluateScript:error: method:

This method returns whatever the result of the script you passed in was. If the JavaScript code threw an exception for any reason, the error variable will contain information about it.

Any values returned by the evaluateScript: method are returned as Objective-C objects, and are automatically converted from their JavaScript type into the most appropriate Objective-C type. Strings are turned into NSStrings, numbers become NSNumbers, and JavaScript objects get turned into NSDictionary objects.

Calling native functions from JavaScript

Basic stuff, right? However, the fun stuff happens when you give the JavaScript code some native functions that it can call.

You can add register functions in the JavaScript context that scripts can call, by creating a block object and giving it to the JSContext. These block objects take one parameter, an NSArray that contains the parameters that were passed in from JavaScript, and return an id, which will be automatically converted back to a JavaScript value.

Example time!

Once you’ve added a function, you can call it from JavaScript.

Calling JavaScript functions from native code

Things get really interesting when your native code can call JavaScript code. Because you can load the new code at run-time, or even replace code without having to re-launch your app, you get a crazy amount of flexibility.

If you run some JavaScript code that returns a function, it will be returned to as a JSFunction block, which can be called just like a function.

Working with native objects in JavaScript

Working in only numbers and strings is boring. What would be really awesome is if Captain could let JavaScript work with Objective-C objects in a clean, simple way that had zero programmer overhead, and let the developer write clean code in both languages.

Wait, you can? BONUS.

Any property that uses the standard compiler-generated setter and getter methods can be modified by JavaScript code.

In addition to working with data, you can also call methods on Objective-C objects from JavaScript.

But doesn’t Objective-C have crazy weird method names that look ugly in other langauges?

That’s right, it does. That’s part of the reason why Captain only exposes certain methods to JavaScript.

If your Objective-C object has a method named handleFoo:, which takes one parameter, it will be exposed through JavaScript as “foo”. Only methods that meet these requirements are callable from JavaScript.

The reasoning behind this is that Captain is intended to be a simple way to expose limited amounts of domain-specific functionality to a scripting environment, rather than a comprehensive scripting bridge. By only having to support a limited amount of interaction between native code and the script, life is made easier for both worlds.

Example! Here’s an Objective-C object:

And here’s code that interacts with it:

Loading scripts

The final piece to this is in loading a large number of JavaScript functions, which native objects can use.

Let’s say you’ve got a JavaScript file named “UsefulFunctions.js”, and it contains this:

You can register the entire set of functions contained in the script using the loadScriptNamed:error: method.

Doing this causes the JSContext to look for the file “UsefulFunctions.js”, first in the Documents folder, and then in the built-in bundle resources. Because it looks in this order, you can modify the app’s functionality by simply dropping in a replacement file with the same name in iTunes File Sharing, and re-launching the app.

Delegating behaviour to JavaScript

The functions that you load in can also be used by Objective-C objects to delegate some of their behaviour to.

For example, say you have a JavaScript file ‘Foo.js’, containing the following code:

Once Foo.js is loaded in, you can call the function, and additionally provide it with an object to use for the this variable.

With this method, your classes can easily call out to JavaScript when they need some work done.

Conclusion

We hope you enjoy using Captain, and we’d love to see what else you do with it. Captain is on GitHub! We welcome pull requests, and if you’ve got any questions, shoot us an email at lab@secretlab.com.au

Enjoy!

Apple, CodeSecret Labfoss
UIView+Glow: Fancy Glowing Effects for Everyone

We recently needed to add a tutorial to a board game (see SLTutorialController), and realised that we needed a way to highlight various controls and other user interface elements that the user should interact with next. A common way that this is handled is by making things glow, often with an animation. So, we wrote UIView+Glow. It's a very simple category that adds two methods: startGlowing and stopGlowing. When you call startGlowing, the view will start to pulse with a soft light; this effect is removed when stopGlowing is called.

You can see a video of it in action here:

It's available on our GitHub now!

Embedding External Nibs for Fun and Profit

Here's a common use case we run across. We're building a really nice custom control, and it's got a reasonably complex view hierarchy. We want to be able to have multiple copies of it, plus keep the complexity of the higher-level UI down, so we store it in a nib.

The only way you can get stuff out of a nib is to use the UINib API to load the nib, get the loaded object, and then start using it. This means writing code. We want to keep the amount of code in the app down, and programatically generating interfaces sucks. What we want to do is to just insert a UIView placeholder into our view controller, and have it be replaced with the full control at runtime.

So, how can we do this?

Some previous work on this topic was done by Yang Meyer, who figured out that you can override the -awakeAfterUsingCoder: method to switch out the placeholder view with a view loaded from a nib at load-time. However, this method doesn't play nice with ARC.

We came up with a solution that we quite like. It's easy to understand, allows us to keep the control's UI in a separate nib, and also allows us to simply insert an empty UIView into our view controllers (and not clutter them up).

We used this technique in the development of SLNumberPickerView.

The Technique

First, design the interface for your class in a separate nib. We find it helpful to write a class method that loads and returns the object:

Next, we override -awakeAfterUsingCoder: to check to see if self is a placeholder view or the real view that was loaded from the external nib. We determine this based on how many subviews we have - if it's zero, then we're the empty placeholder view.

If we figure out that self is the placeholder, we load a new instance of the view, and then add it as a subview of the placeholder. We also keep a reference to this internal view, and forward any relevant messages to it.

There's one drawback to this technique: because we're inserting the real view inside the placeholder view, we're keeping an extra instance of the class around (though none of its subviews are loaded, so not too much additional memory is allocated.)

You can see an example of this technique in action in SLNumberPickerView, available on our GitHub.

SLNumberPickerView

SLNumberPickerView is a control that presents a 3-digit number picker. It's very customisable, highly themable, and very easy to use. We made SLNumberPickerView after a designer, the marvellous @padschneider, crafted this look for a number picker:

SLNumberPickerView

Our first reaction: "argh, UIPickerView can't be made to look like that, no matter how many UIView hierarchy hacks you throw at it!"

Our second reaction: "hey, UIPickerView sucks anyway, let's make a better version for this problem!"

So, here's SLNumberPickerView. The image above it isn't from our PSDs, it's a screenshot from the working thing in the simulator.

It does one thing: present a suitcase-combination-lock-style interface to the user, which lets the user choose three digits. You can then query the view to get the integer value of the number the user's chosen. SLNumberPickerView also provides a delegate protocol that you can implement to be notified of any changes.

SLNumberPickerView keeps its own view hierarchy in a separate nib, which makes it very easy to theme - you can change the background colours, overlay images, and do all kinds of things with it.

SLNumberPickerView allows you to control the colour and font of the numerals, and also allows you to specify a tiled background image that is placed beneath the numerals. We added this in order to add the tick-marks that you see at the right of each column in the above screenshot.

How to use it

Download SLNumberPickerView from GitHub, and add the files to your project. SLNumberPickerView requires ARC.

Next, add an empty UIView to your interface. Size it to something like 145 wide by 100 high, and set its class to SLNumberPickerView. At runtime, the number picker view will be placed inside it.

You can query the number picker view for its value via the read-only value property:

Alternatively, you can conform to the SLNumberPickerViewDelegate protocol, which defines the following method:

Set yourself to be the delegate, and you'll receive messages every time the number selected by the user changes.

Caveats

SLNumberPickerView currently doesn't support setting a value programmatically.

It's available on GitHub now.

SLTutorialController

SLTutorialController is a class that manages the user’s progression through a linear tutorial. We built it while adding a tutorial to a game we made for a client. In this post, you’ll learn what it can be used for, and how to use it!

Tutorial Tutorial!

Say you have three stages in a tutorial: build a building, select a unit, and defeat an enemy.

First, you’d list the stages in SLTutorialController.h:

Next, whenever your player builds a building (at any stage), you add this line:

Likewise, whenever your player selects a unit, you do this:

Likewise for SLTutorialDefeatAnEnemy.

Calls to -tutorialStagePerformed: will ONLY move to the next tutorial stage if the tutorial is actually at that stage. This means your game logic code doesn’t have to do a bunch of state checks on the tutorial, you just stick a -tutorialStagePerformed: at the right spots.

You can ask SLTutorialController for the tutorial’s current state via the tutorialStage property:

SLTutorialController posts the SLTutorialStageUpdated notification whenever the tutorial state changes. This means that you can easily be notified when the state changes.

SLTutorialController stores its data in NSUserDefaults, so it’s remembered for you.

It's available on our GitHub now.