Posts tagged opensource
Using OmniGraffle as a level editor

This was a fun one. As we've mentioned before, we're currently working on a board game for a client. Without going into the details, the game is based on nodes on a game board that are linked together; players move between connected nodes, and claim territory.

When coding up the game, we initially generated the game boards in memory, by directly instantiating 'node' and 'link' objects. Then, when it came time to make the game load different boards on demand, we created a JSON-based data structure that defines the nodes and links. It looks a little something like this:

This structure defines two nodes, including their names and positions, as well as a relationship that links the two together. (Because the graph is nondirectional, we didn't want to define links in the node data structure itself.)

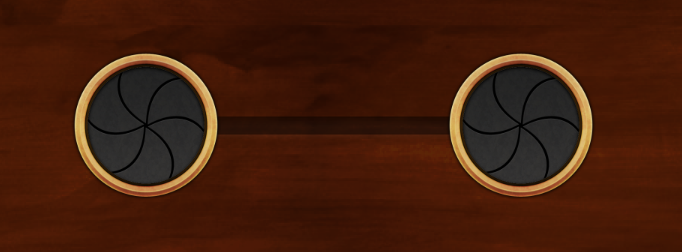
This is all well and good for simple game boards, like this:

tutorial-board

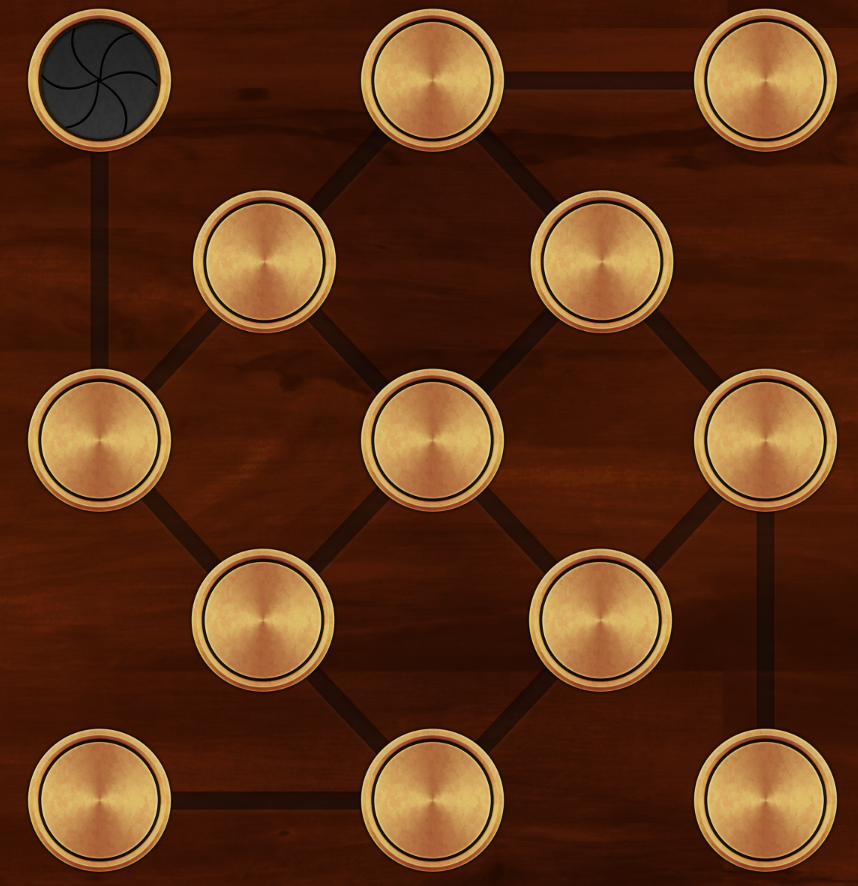
But then the client said, "cool, can you make this?"

hex-board

And we were all:

Reaction_ItalianSpiderman

Clearly, hand-coding wasn't an option, and a tool was needed. Writing one ourselves wouldn't have been the best use of our time, so we looked at our favourite Mac app ever: OmniGraffle Pro. OmniGraffle already knows about objects and connections, and it exposes all of this information through AppleScript.

So, we went searching, found this excellent Gist by Michael Bianco, and adapted it into one that extracts the information we need and generates the game board data that we care about.

Loosely put, it turns this:

omnigraffle-board

Into a level that can be loaded:

sembl-board

How it works

First, we designed the level. In this board game, there are only nodes and connections; we represented nodes as circles, and connected the nodes with lines.

omnigraffle-shot

The first thing the script does, we get access to OmniGraffle via the Scripting Bridge:

OmniGraffle exposes a list of shapes, which AppleScript can query for important information such as the origin point, and its text. You can also query and set a special "tag" property for each shape, which is useful for storing an identifier. We base the identifier on the text of the shape, if it has any; otherwise, we use a random number.

So, to generate the list of game nodes, we ask OmniGraffle for all shapes, and format the result into a hash, which we store in an array for later.

When generating the hash for a node, we can also make use of the user data dictionary that OmniGraffle Pro exposes. This lets you set custom key-value pairs for a shape, which is very useful for setting things like which player owns a node, or at what point in the game the node becomes active. This is a simple matter of merging in the userData hash.

Once all nodes have been processed, we know that all shapes have had a tag associated with them; we can then iterate over all shapes a second time, this time generating information for each connection.

Finally, we export the nodes and links as JSON:

Because this script operates on the frontmost open document in OmniGraffle and outputs to stdout, saving the JSON is as simple as a one-line command: $ ruby graffle2board.rb > MyAwesomeBoard.board

Summary

This is a pretty powerful technique, since it lets us design the game maps with a powerful (and, more importantly, pre-existing) tool and import them exactly the way we want them. We're definitely going to be using this more in the future.

You can see the script in GitHub!

UIView+Glow: Fancy Glowing Effects for Everyone

We recently needed to add a tutorial to a board game (see SLTutorialController), and realised that we needed a way to highlight various controls and other user interface elements that the user should interact with next. A common way that this is handled is by making things glow, often with an animation. So, we wrote UIView+Glow. It's a very simple category that adds two methods: startGlowing and stopGlowing. When you call startGlowing, the view will start to pulse with a soft light; this effect is removed when stopGlowing is called.

You can see a video of it in action here:

It's available on our GitHub now!

Embedding External Nibs for Fun and Profit

Here's a common use case we run across. We're building a really nice custom control, and it's got a reasonably complex view hierarchy. We want to be able to have multiple copies of it, plus keep the complexity of the higher-level UI down, so we store it in a nib.

The only way you can get stuff out of a nib is to use the UINib API to load the nib, get the loaded object, and then start using it. This means writing code. We want to keep the amount of code in the app down, and programatically generating interfaces sucks. What we want to do is to just insert a UIView placeholder into our view controller, and have it be replaced with the full control at runtime.

So, how can we do this?

Some previous work on this topic was done by Yang Meyer, who figured out that you can override the -awakeAfterUsingCoder: method to switch out the placeholder view with a view loaded from a nib at load-time. However, this method doesn't play nice with ARC.

We came up with a solution that we quite like. It's easy to understand, allows us to keep the control's UI in a separate nib, and also allows us to simply insert an empty UIView into our view controllers (and not clutter them up).

We used this technique in the development of SLNumberPickerView.

The Technique

First, design the interface for your class in a separate nib. We find it helpful to write a class method that loads and returns the object:

Next, we override -awakeAfterUsingCoder: to check to see if self is a placeholder view or the real view that was loaded from the external nib. We determine this based on how many subviews we have - if it's zero, then we're the empty placeholder view.

If we figure out that self is the placeholder, we load a new instance of the view, and then add it as a subview of the placeholder. We also keep a reference to this internal view, and forward any relevant messages to it.

There's one drawback to this technique: because we're inserting the real view inside the placeholder view, we're keeping an extra instance of the class around (though none of its subviews are loaded, so not too much additional memory is allocated.)

You can see an example of this technique in action in SLNumberPickerView, available on our GitHub.

SLNumberPickerView

SLNumberPickerView is a control that presents a 3-digit number picker. It's very customisable, highly themable, and very easy to use. We made SLNumberPickerView after a designer, the marvellous @padschneider, crafted this look for a number picker:

SLNumberPickerView

Our first reaction: "argh, UIPickerView can't be made to look like that, no matter how many UIView hierarchy hacks you throw at it!"

Our second reaction: "hey, UIPickerView sucks anyway, let's make a better version for this problem!"

So, here's SLNumberPickerView. The image above it isn't from our PSDs, it's a screenshot from the working thing in the simulator.

It does one thing: present a suitcase-combination-lock-style interface to the user, which lets the user choose three digits. You can then query the view to get the integer value of the number the user's chosen. SLNumberPickerView also provides a delegate protocol that you can implement to be notified of any changes.

SLNumberPickerView keeps its own view hierarchy in a separate nib, which makes it very easy to theme - you can change the background colours, overlay images, and do all kinds of things with it.

SLNumberPickerView allows you to control the colour and font of the numerals, and also allows you to specify a tiled background image that is placed beneath the numerals. We added this in order to add the tick-marks that you see at the right of each column in the above screenshot.

How to use it

Download SLNumberPickerView from GitHub, and add the files to your project. SLNumberPickerView requires ARC.

Next, add an empty UIView to your interface. Size it to something like 145 wide by 100 high, and set its class to SLNumberPickerView. At runtime, the number picker view will be placed inside it.

You can query the number picker view for its value via the read-only value property:

Alternatively, you can conform to the SLNumberPickerViewDelegate protocol, which defines the following method:

Set yourself to be the delegate, and you'll receive messages every time the number selected by the user changes.

Caveats

SLNumberPickerView currently doesn't support setting a value programmatically.

It's available on GitHub now.

SLTutorialController

SLTutorialController is a class that manages the user’s progression through a linear tutorial. We built it while adding a tutorial to a game we made for a client. In this post, you’ll learn what it can be used for, and how to use it!

Tutorial Tutorial!

Say you have three stages in a tutorial: build a building, select a unit, and defeat an enemy.

First, you’d list the stages in SLTutorialController.h:

Next, whenever your player builds a building (at any stage), you add this line:

Likewise, whenever your player selects a unit, you do this:

Likewise for SLTutorialDefeatAnEnemy.

Calls to -tutorialStagePerformed: will ONLY move to the next tutorial stage if the tutorial is actually at that stage. This means your game logic code doesn’t have to do a bunch of state checks on the tutorial, you just stick a -tutorialStagePerformed: at the right spots.

You can ask SLTutorialController for the tutorial’s current state via the tutorialStage property:

SLTutorialController posts the SLTutorialStageUpdated notification whenever the tutorial state changes. This means that you can easily be notified when the state changes.

SLTutorialController stores its data in NSUserDefaults, so it’s remembered for you.

It's available on our GitHub now.